
Set up Threadmaker in five steps
Threadmaker pairs a Slack channel with a Jira project so comments sync both ways. Setup is two app installs, one token, and a couple of toggles — no API keys to manage, no webhooks to wire. Here's the whole thing, start to finish.
Add Threadmaker to Slack — free for up to 10 Jira users. The whole thing takes under ten minutes.
Who needs to be in the room: a Slack workspace admin (only they can reveal the token and map a channel) and a Jira admin (only they can install the app and enable a project). If that's two people, steps 1 and 3 are the Slack admin's, steps 2 and 4 the Jira admin's.
Tip: click any screenshot to open it full size.
Step 1 — Add Threadmaker to Slack and copy your token
Use the Add Threadmaker to Slack button above and authorize the workspace. Slack drops you back here and DMs you a link into the app; open it from Apps → Threadmaker → Home. The Home tab shows your Connection Token just under Step 1 — click Reveal token and copy it. This token is what links your Slack workspace to Jira, so keep it private.
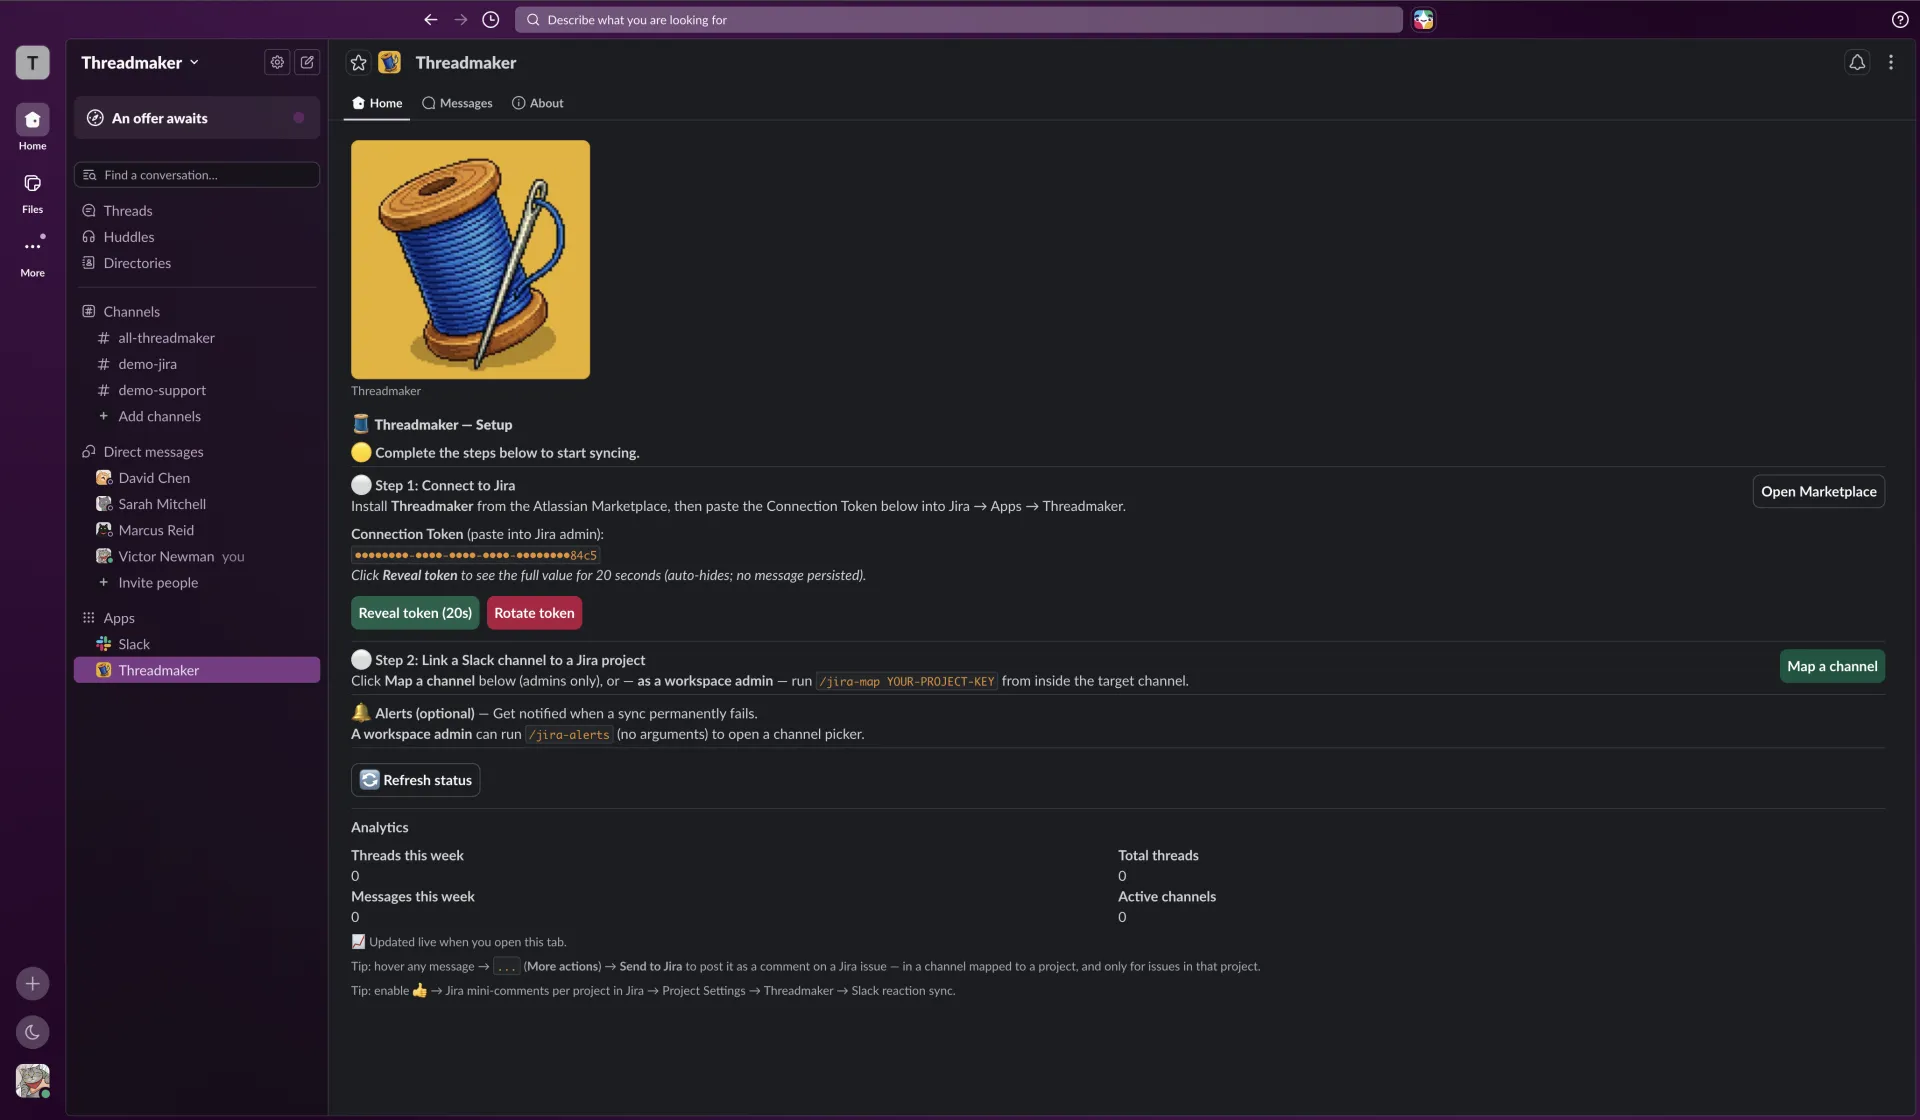
The Home tab doubles as your setup dashboard — it fills in as you finish the steps below. Here's what a fully-connected workspace looks like, so you know what you're heading toward:
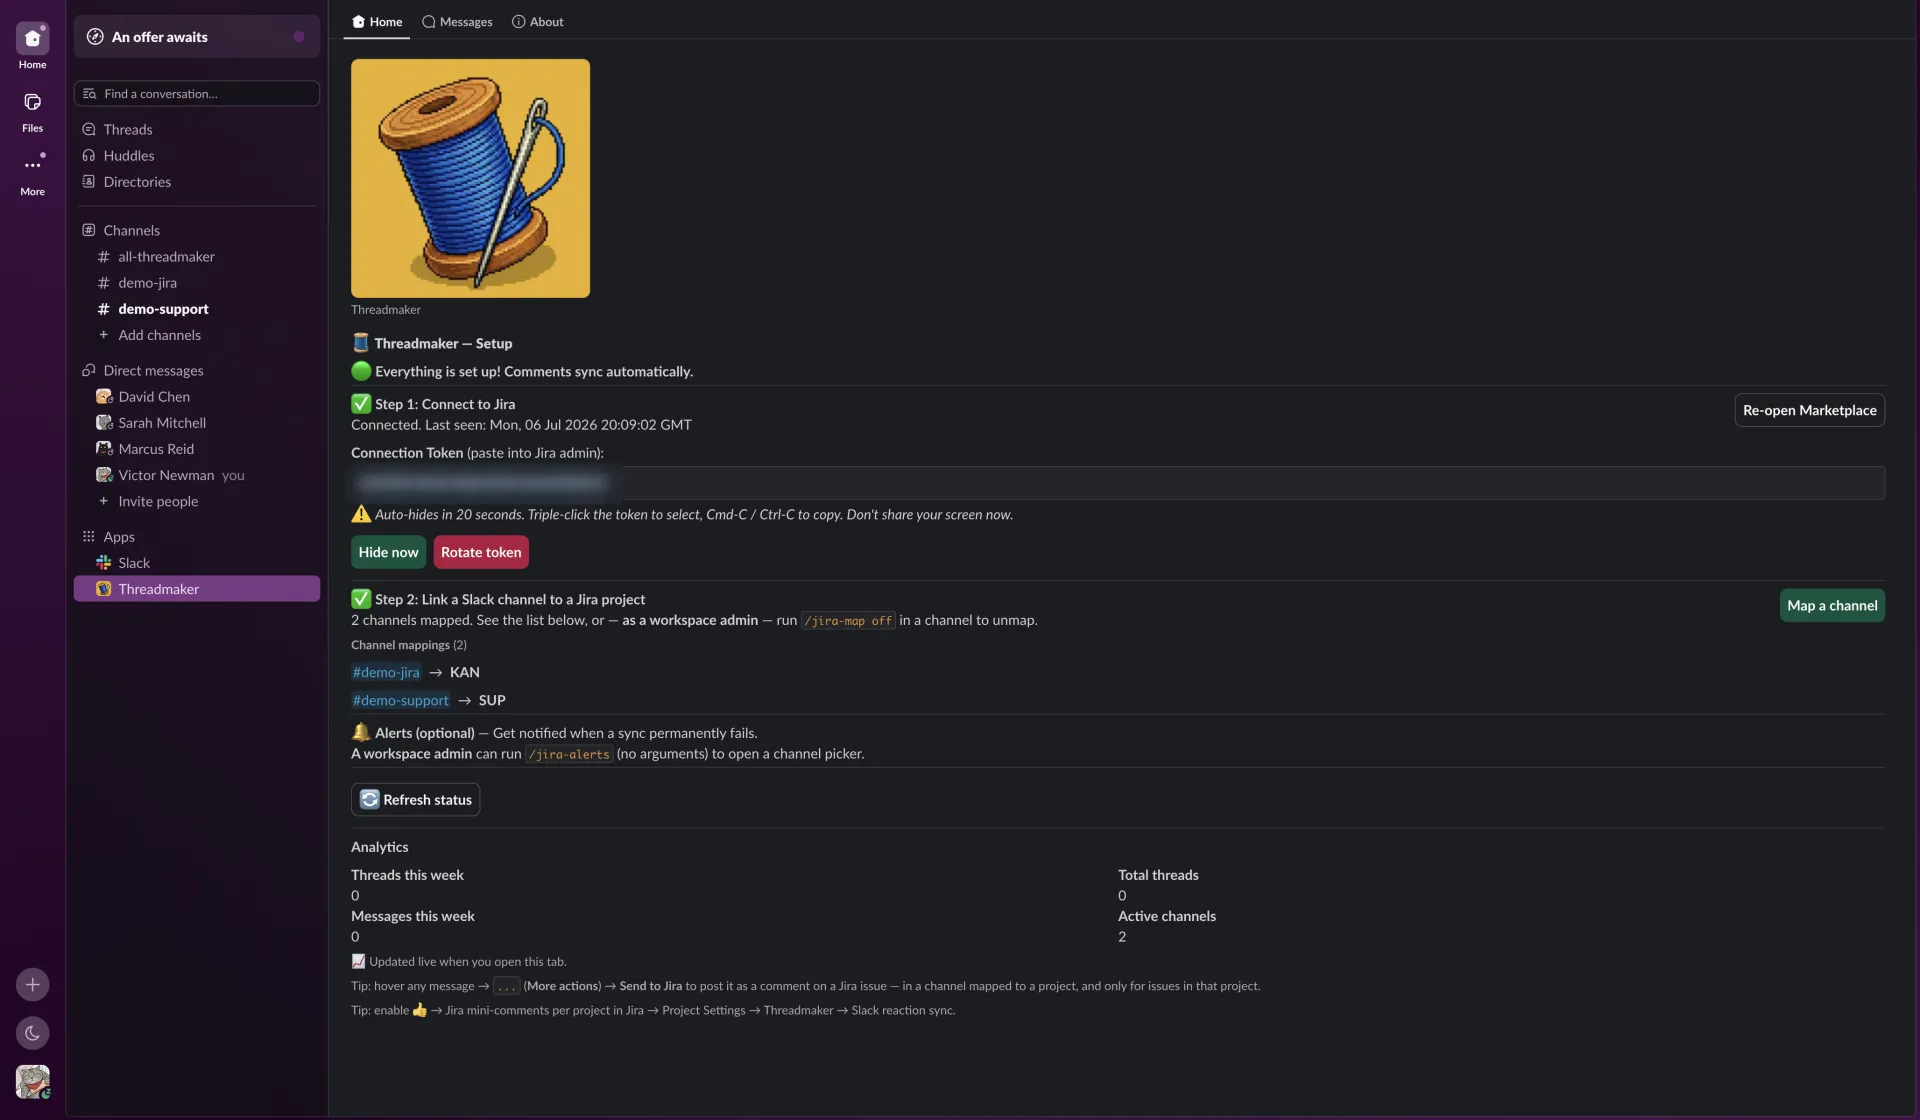
Step 2 — Connect Jira to Slack
Install Threadmaker from the Atlassian Marketplace. In Jira, go to Settings (⚙) → Apps → Threadmaker and find the Global Settings section on that page — paste the Connection Token there and hit Save. The page confirms the token is configured — you'll see No projects connected yet, which is expected: you pair a channel to a project in the next step.
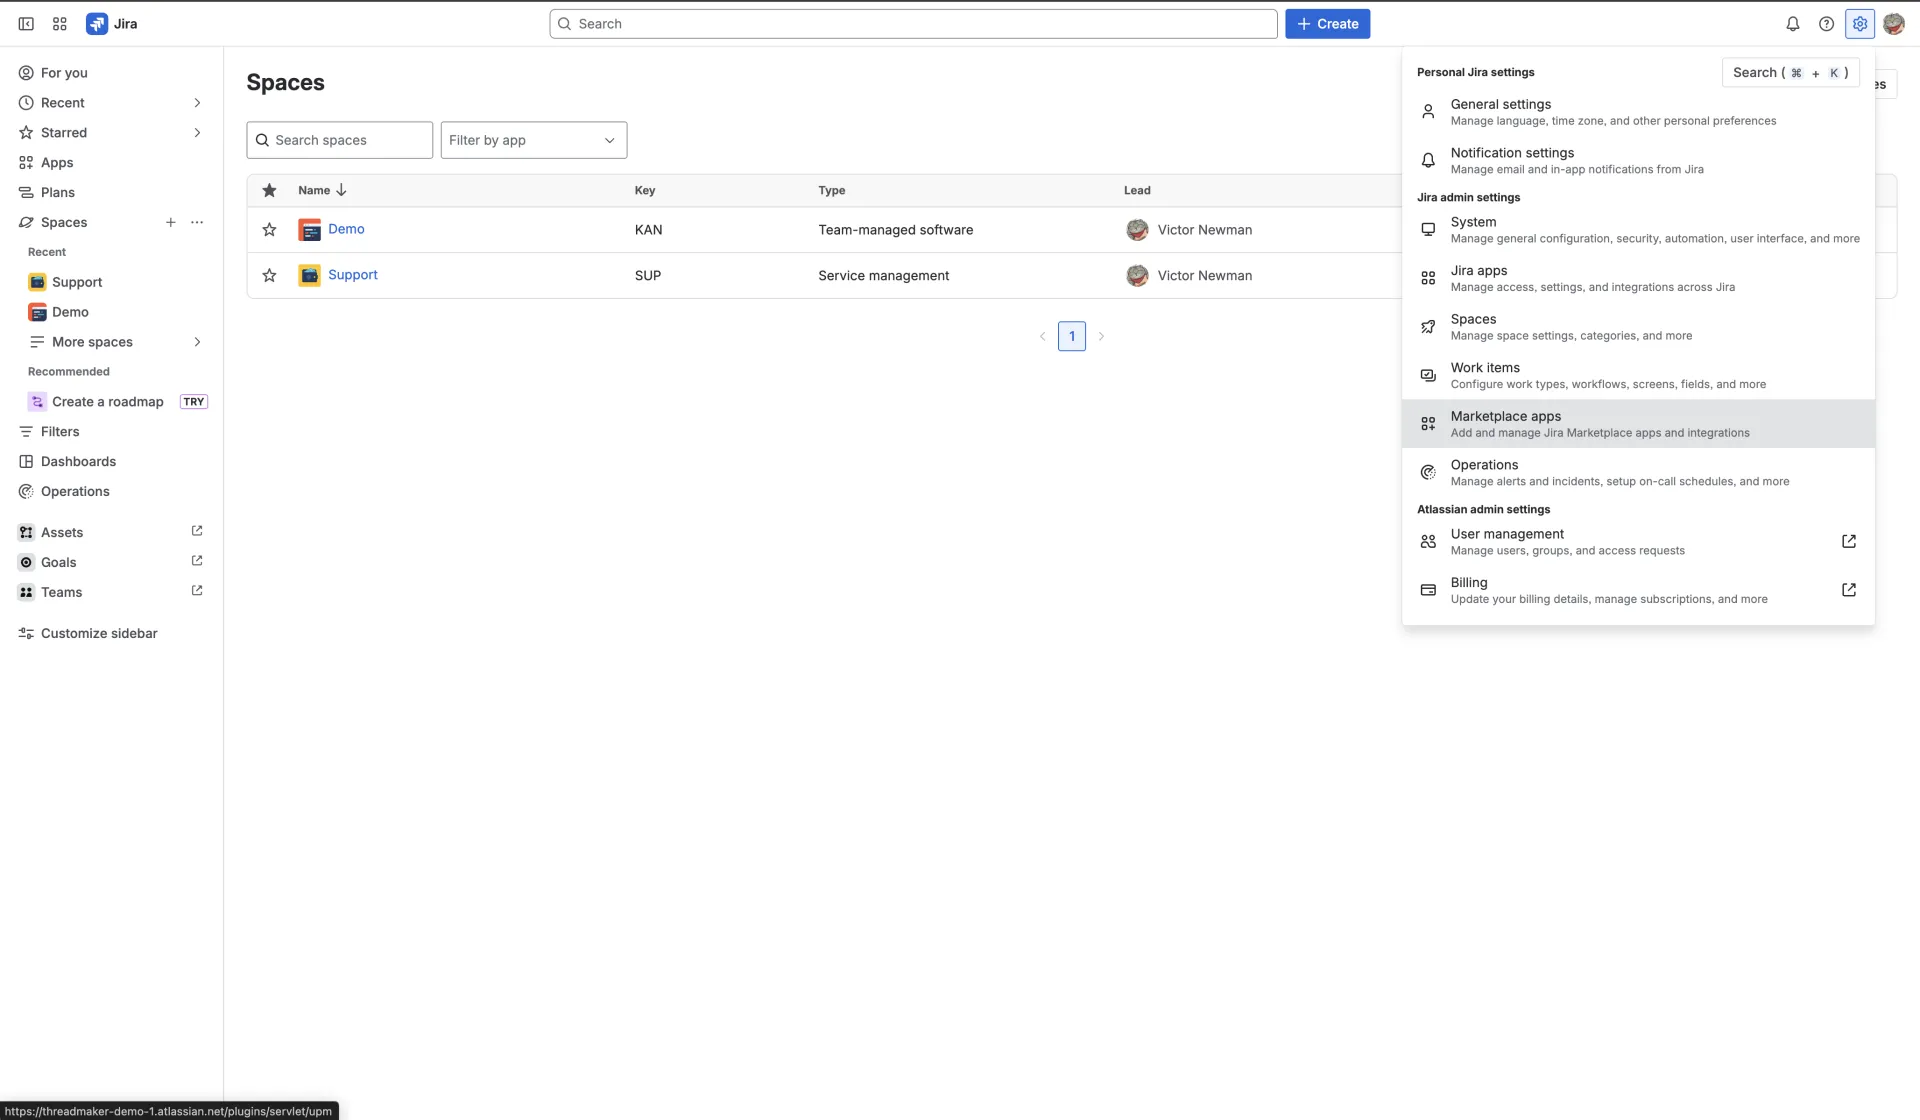
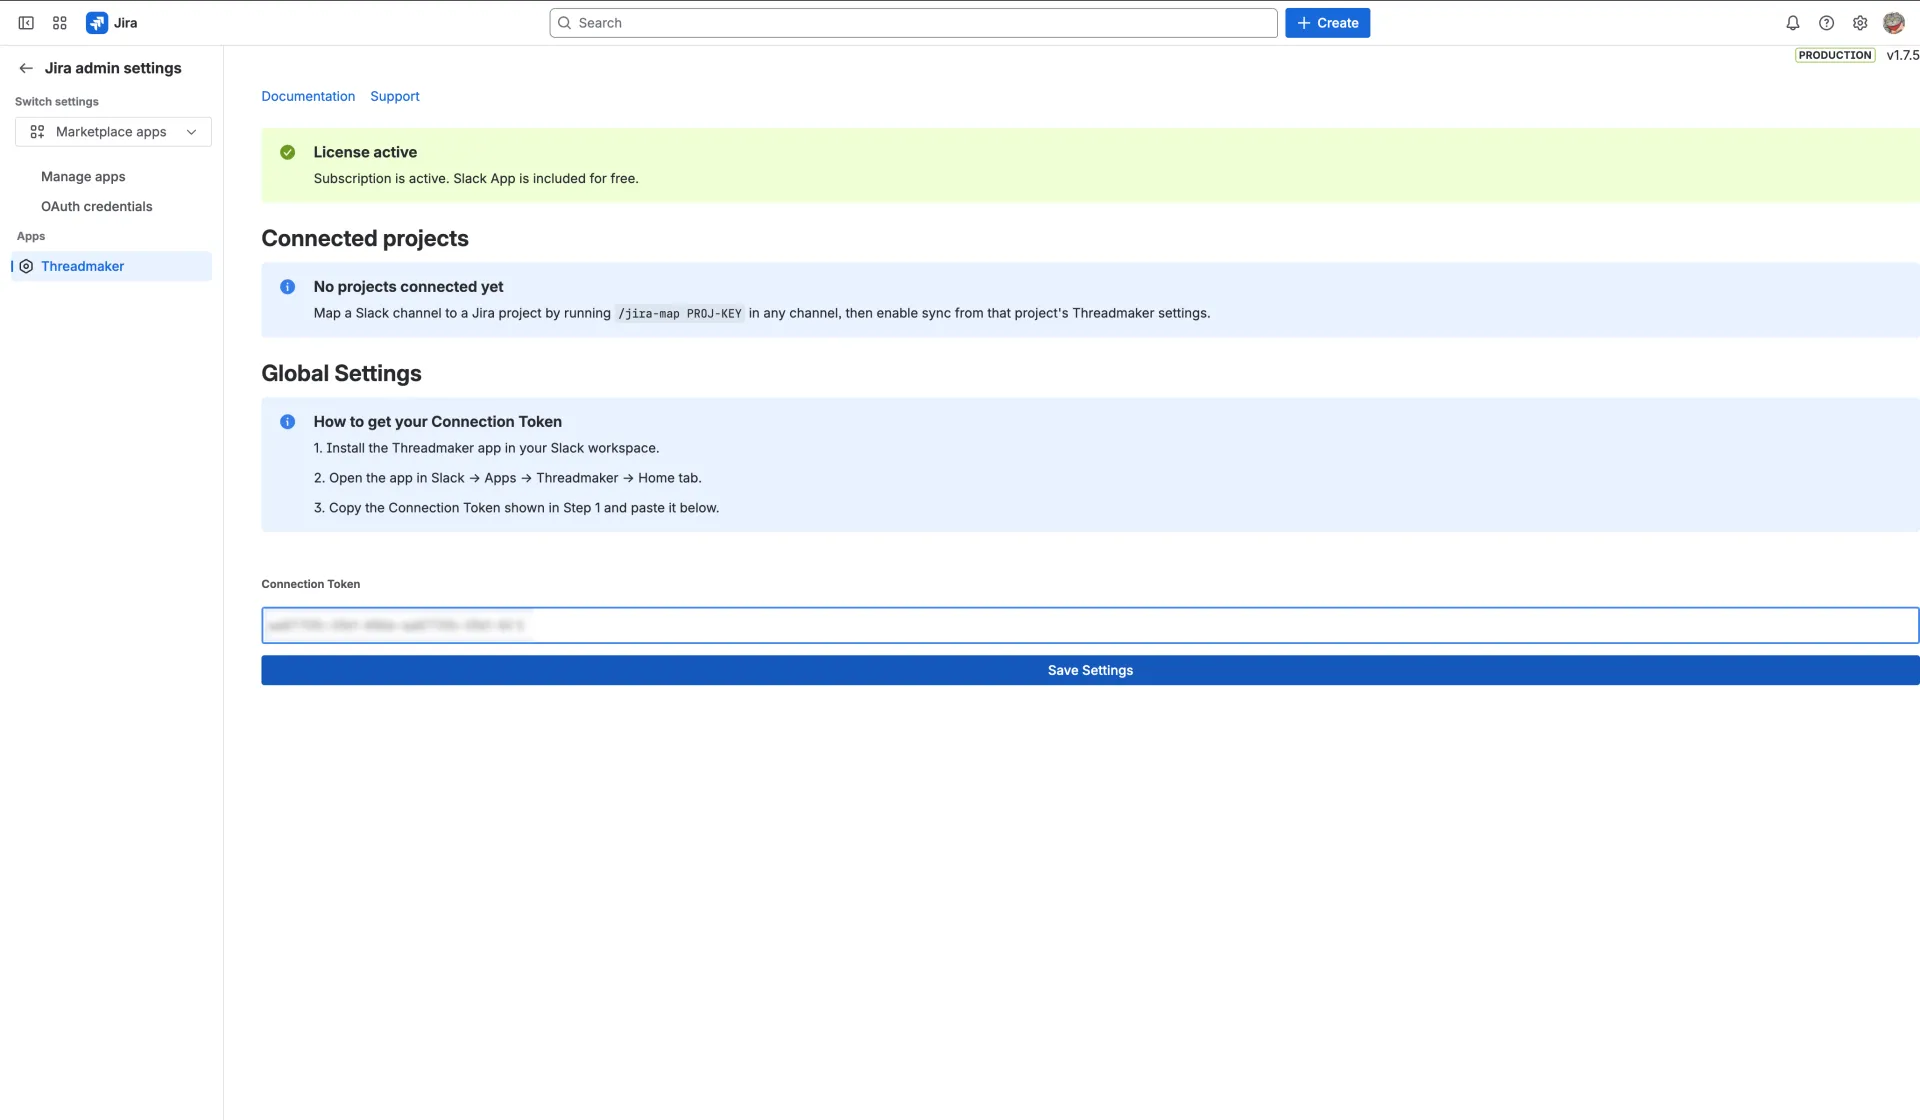
Step 3 — Map a Slack channel to a Jira project
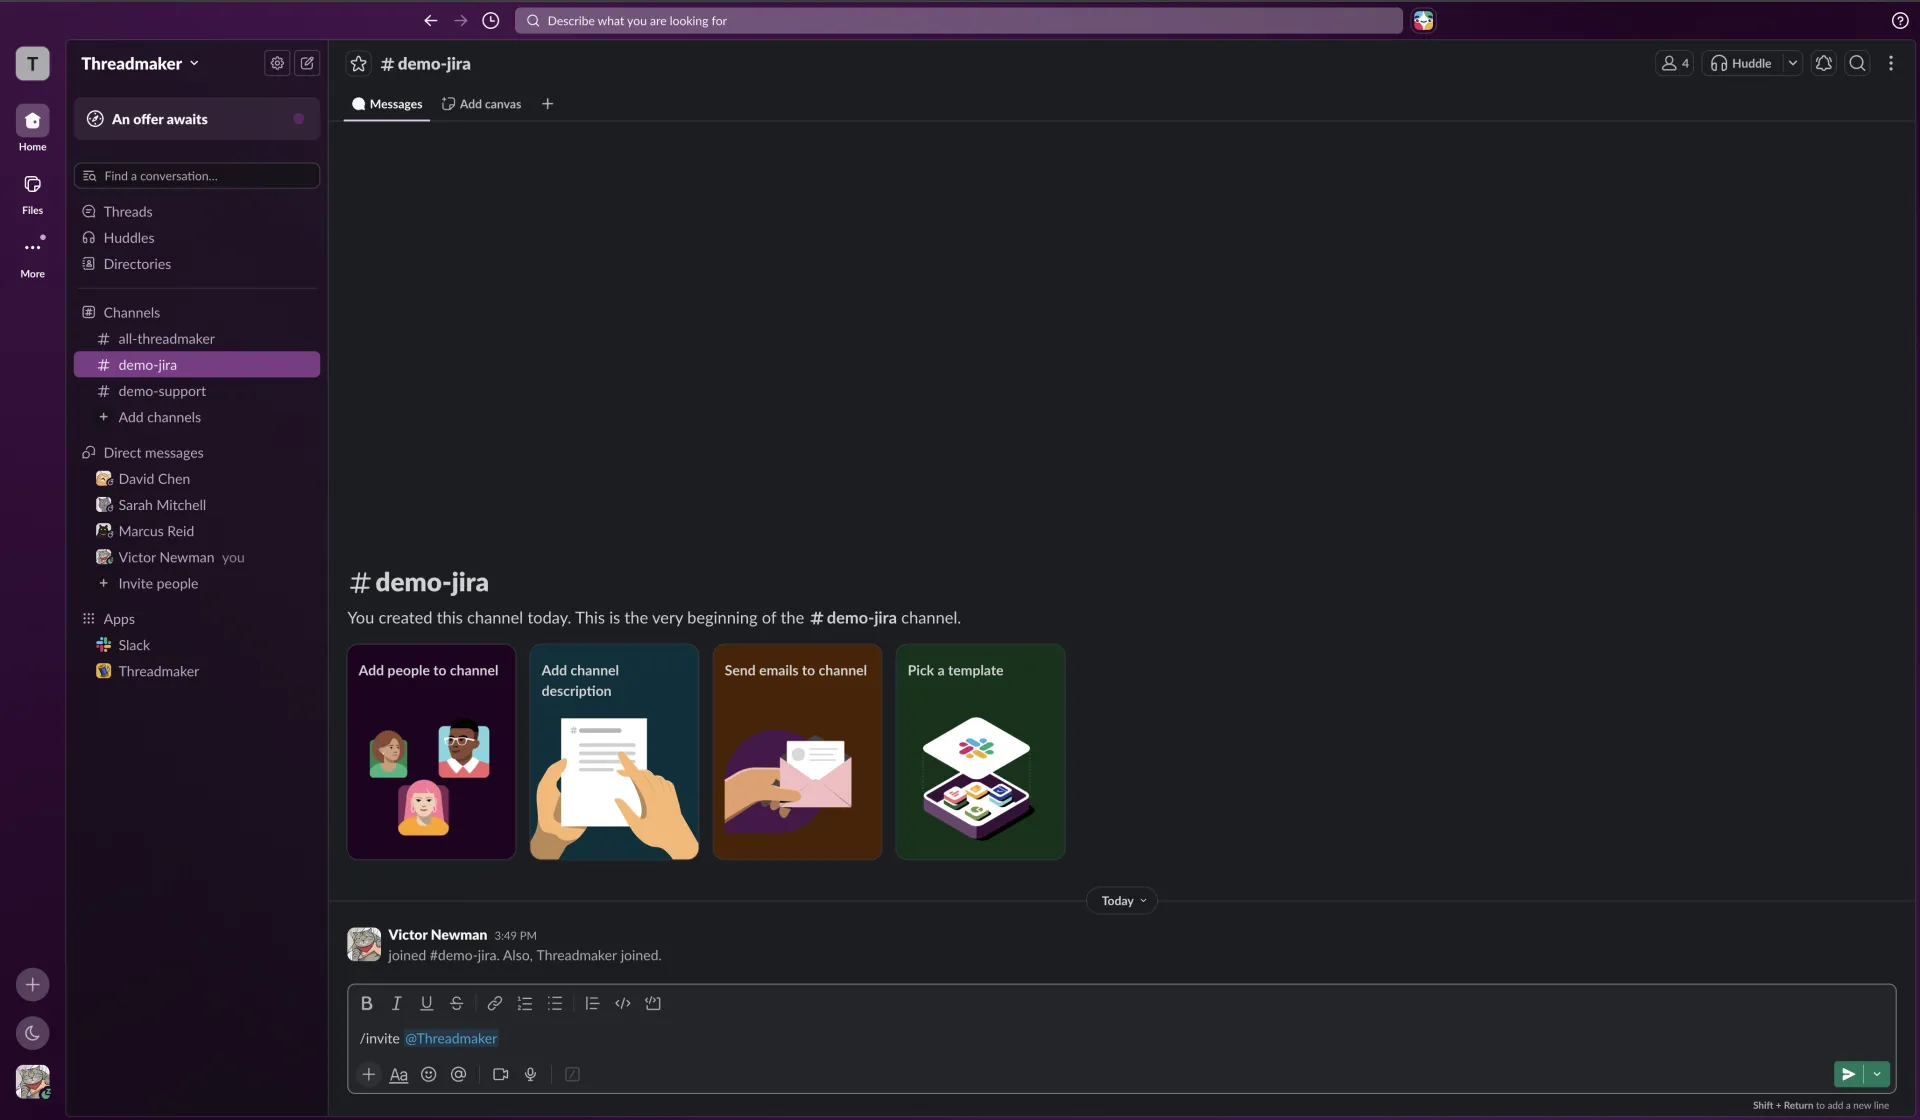
In the channel you want synced, invite the bot with
/invite @Threadmaker (a Slack rule — the bot has to be a member),
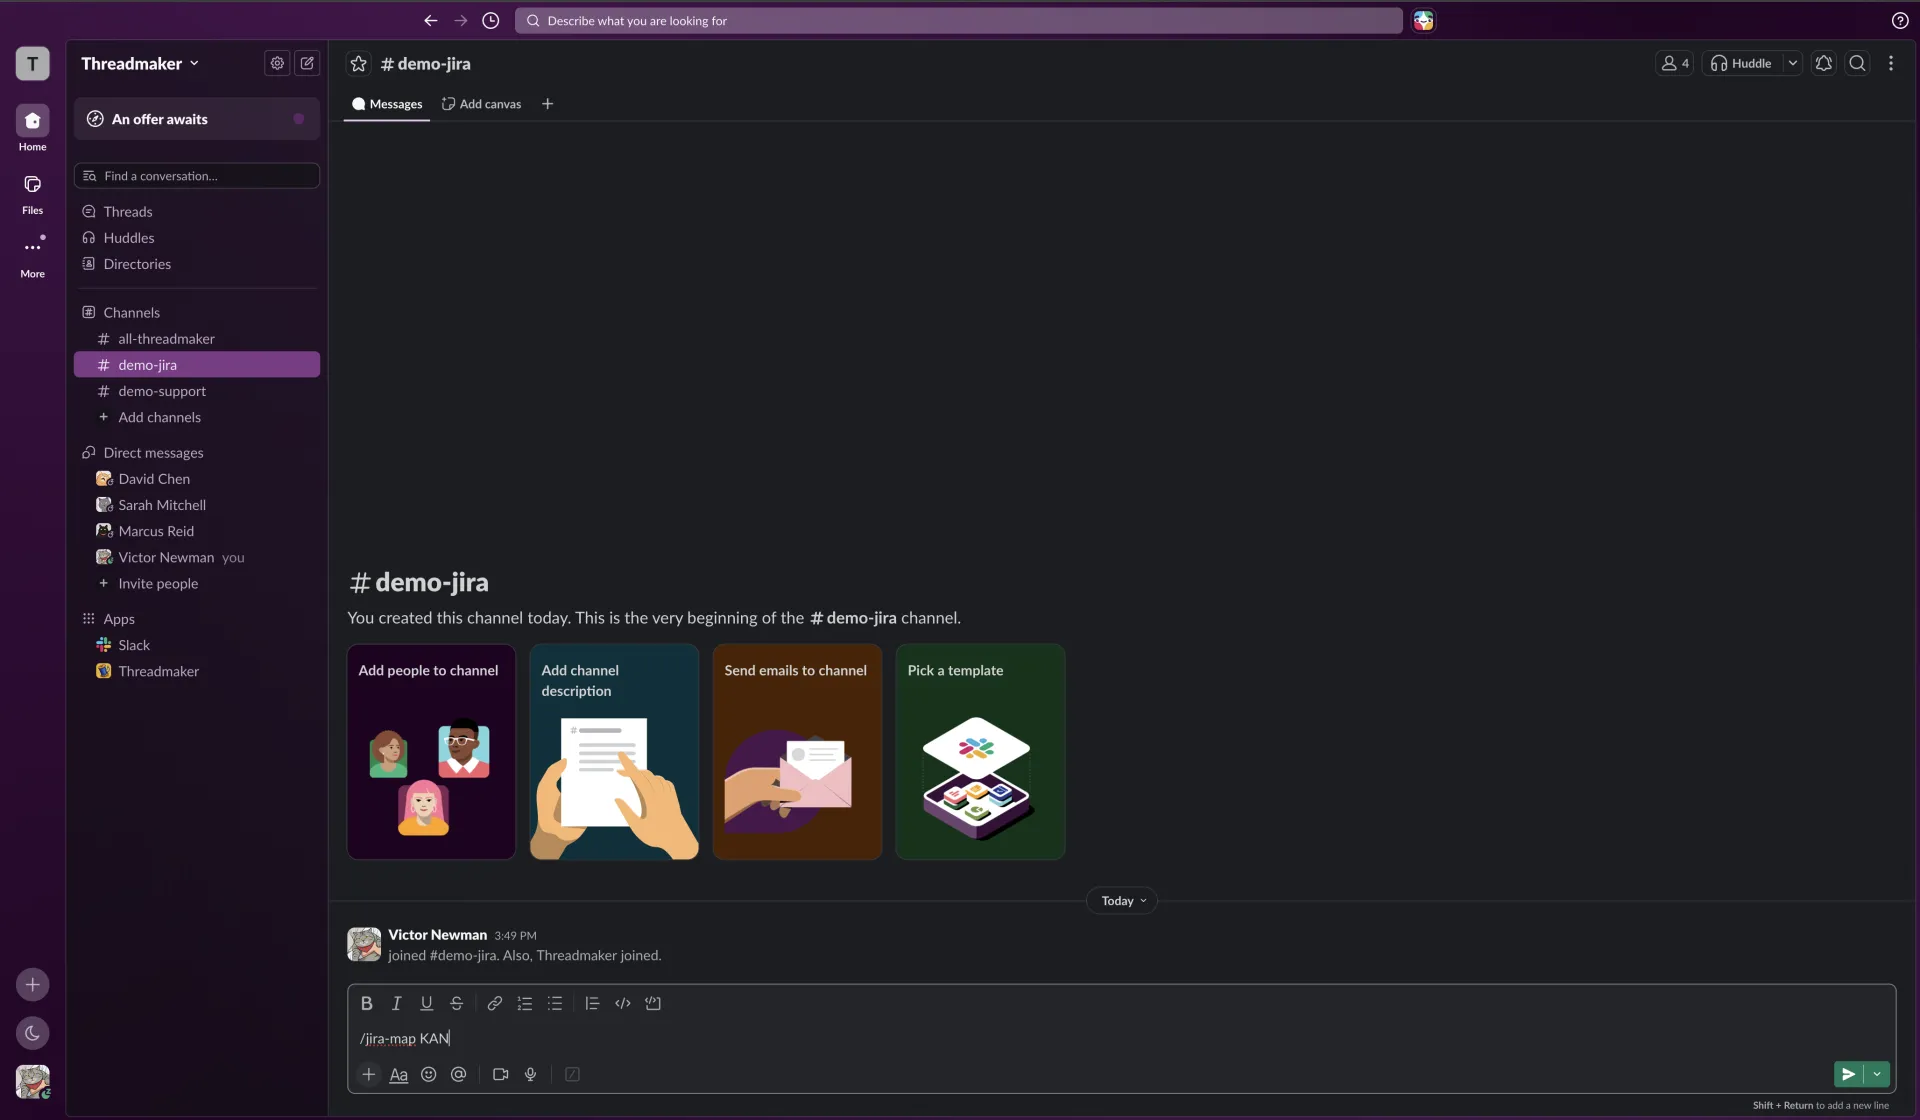
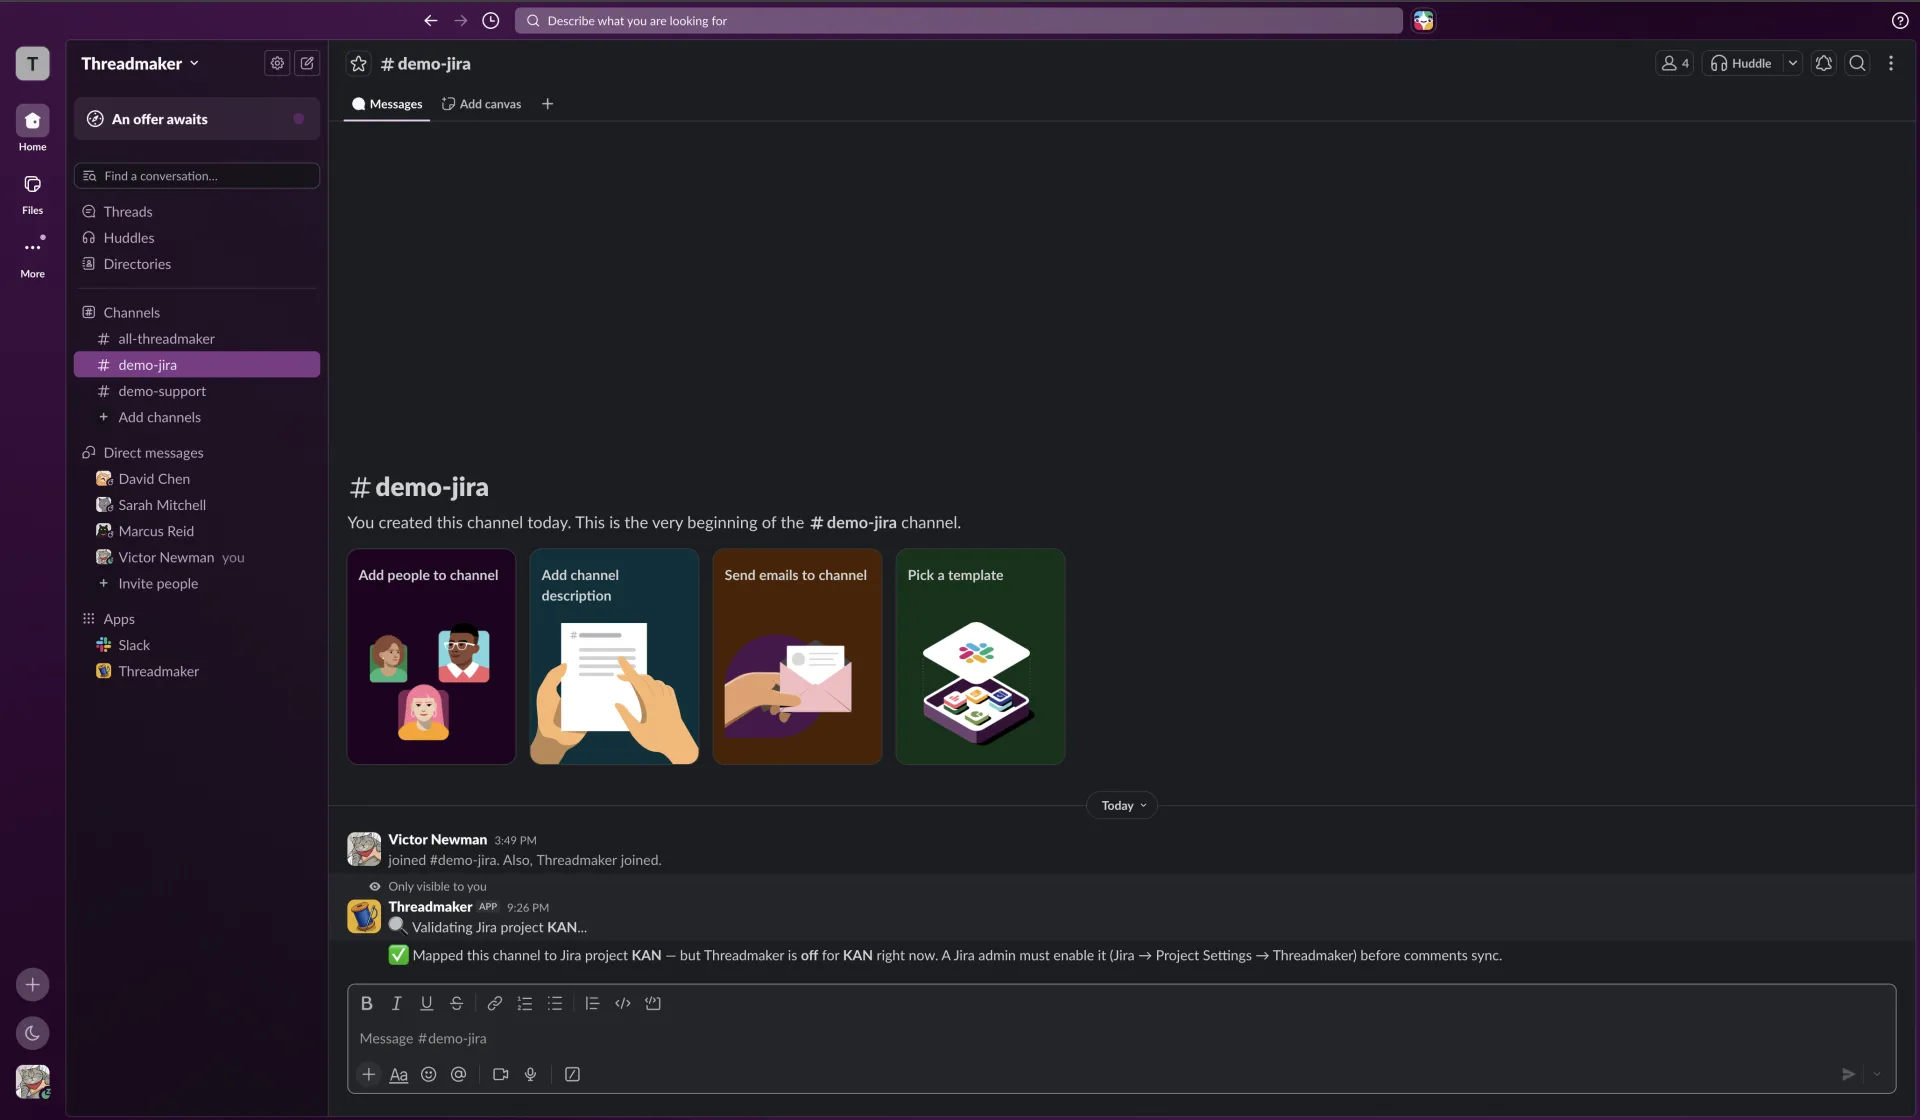
then run /jira-map YOUR-PROJECT-KEY. Threadmaker confirms the
mapping. If the project isn't enabled yet, it tells you so — that's the next
step.
Step 4 — Enable Threadmaker for the project
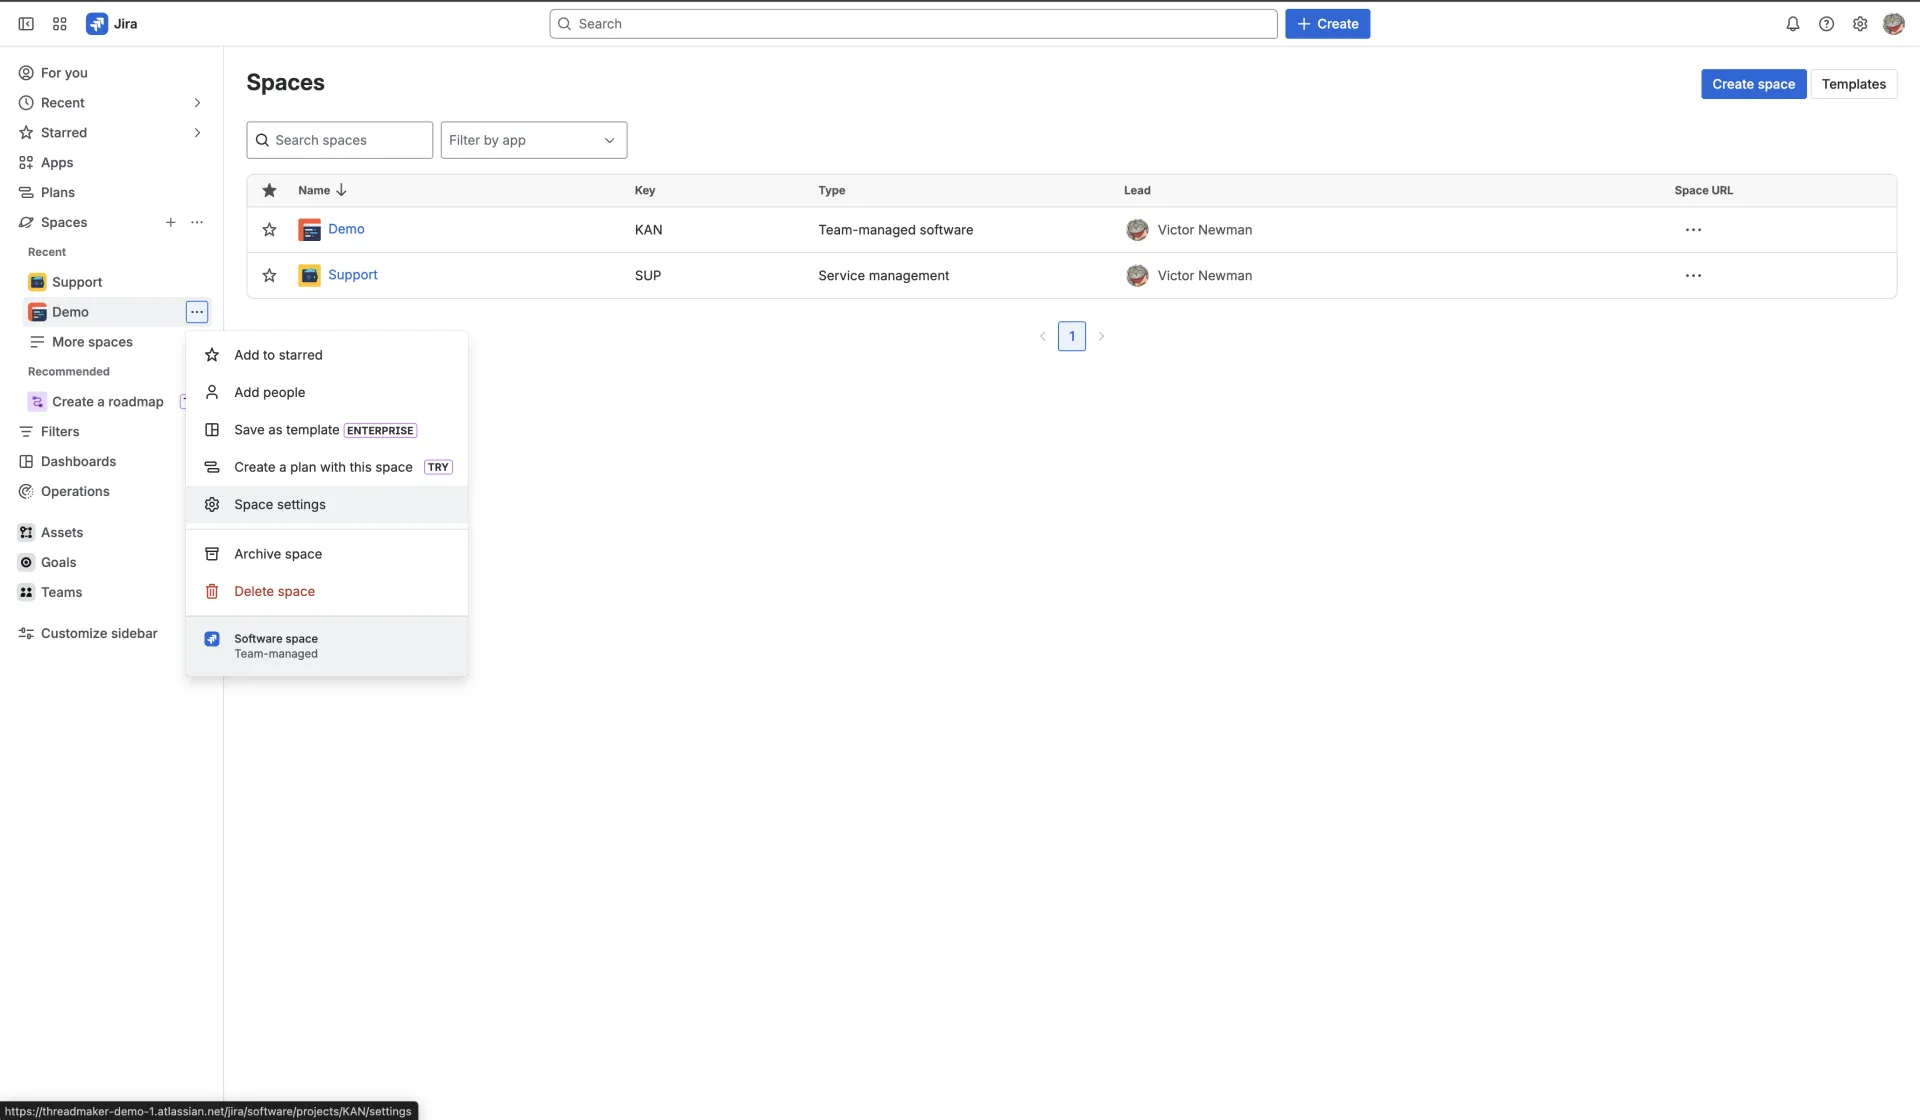
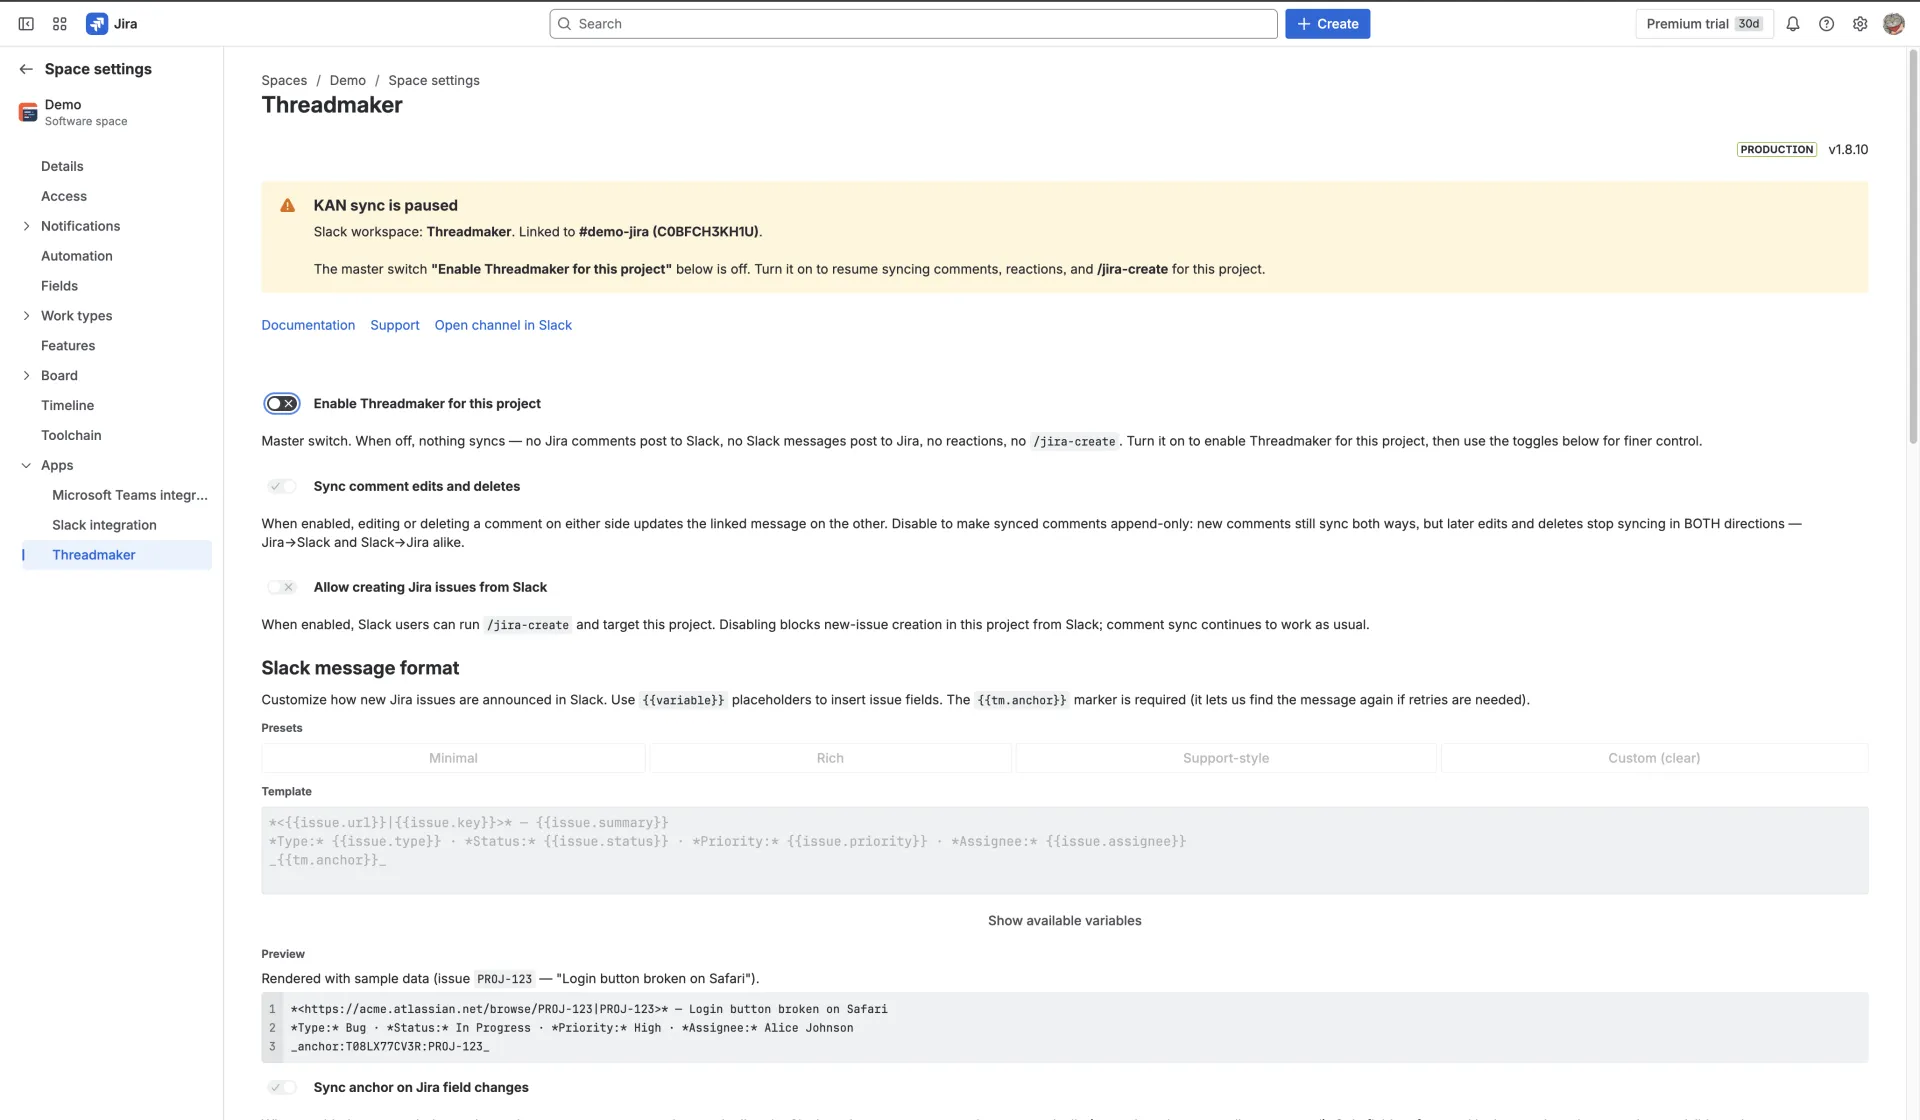
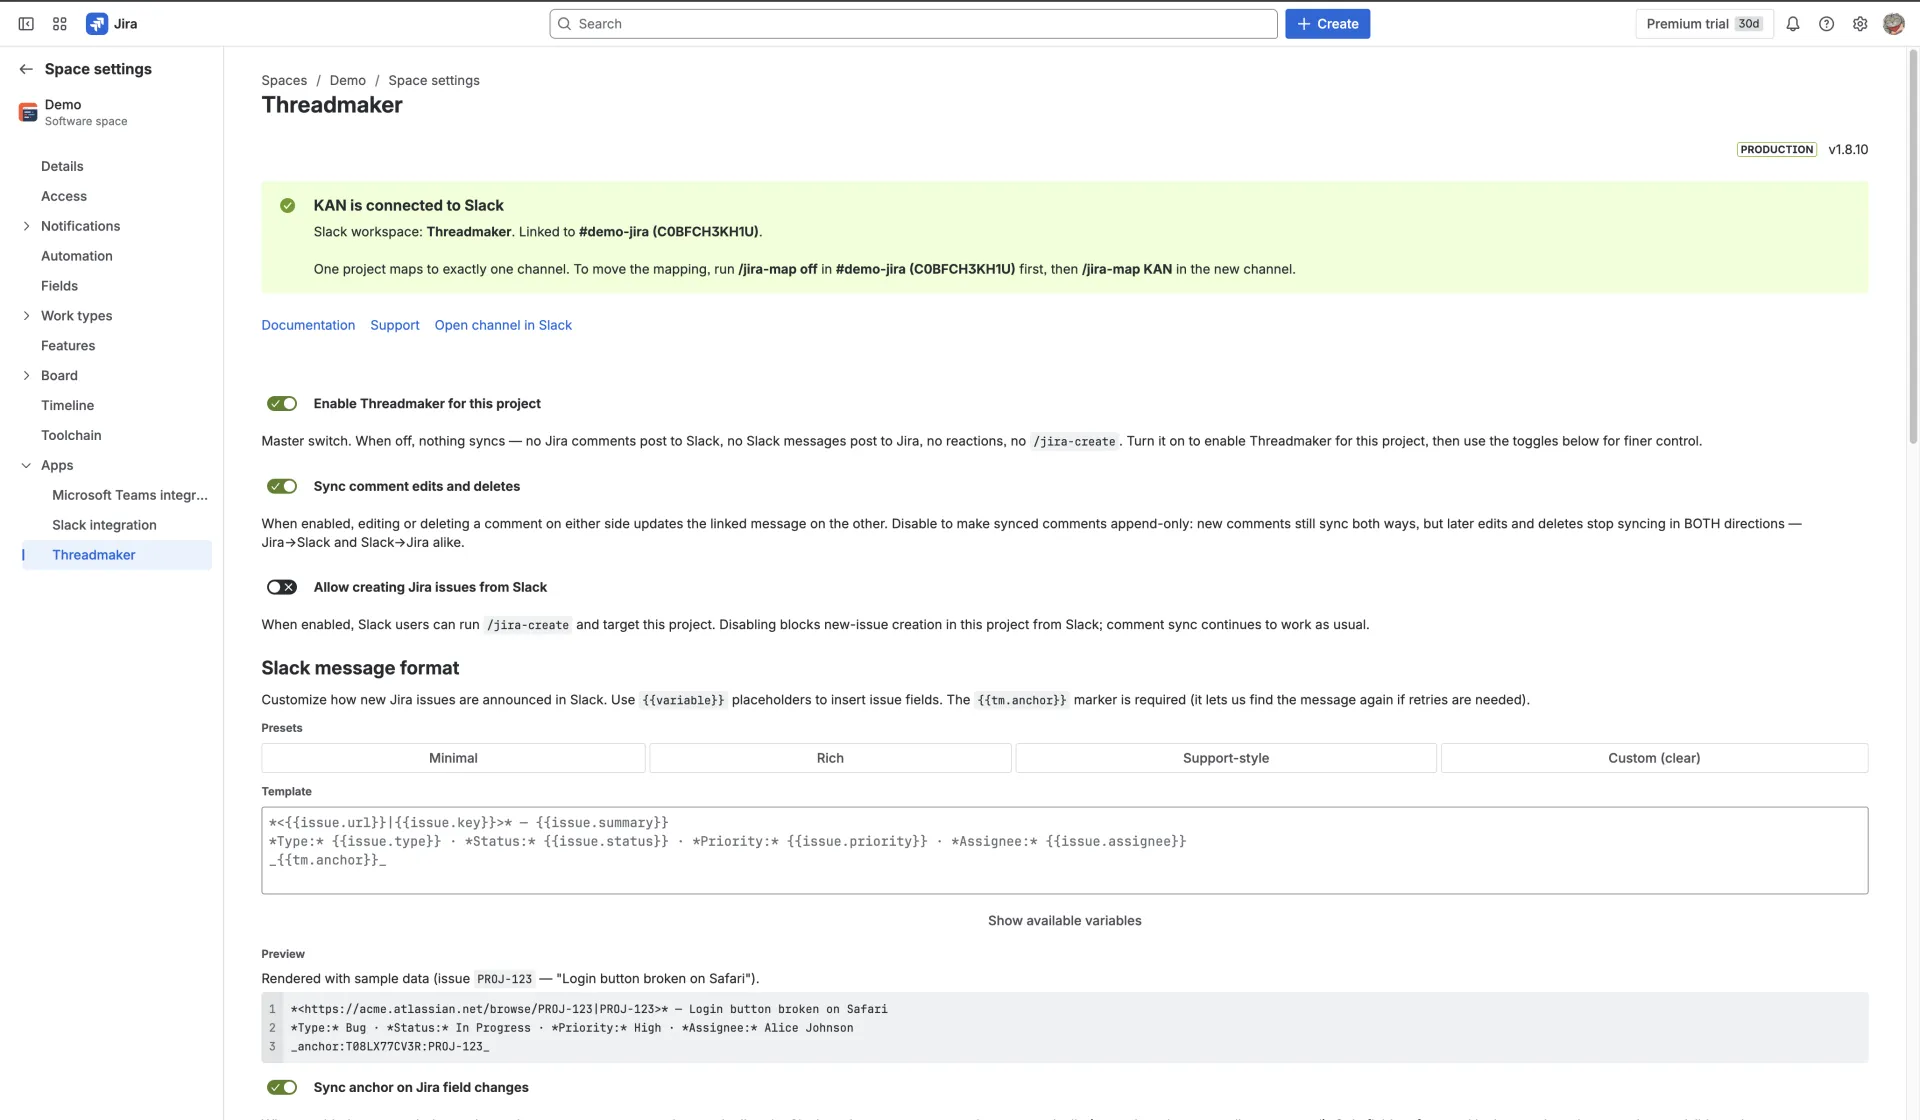
New projects start off — nothing syncs until a Jira admin turns Threadmaker on for that specific project. It's a deliberate opt-in: no comment leaves Jira until you say so. In Jira, open Project Settings → Apps → Threadmaker and flip the master switch, Enable Threadmaker for this project, on. Then scroll to the bottom of the page and click Save settings — changes on this Threadmaker settings page don't take effect until you save.
Step 5 — Tune it (optional) — and you're live
You're already syncing; everything below is optional polish. Each project has its own controls — message templates for how issues and comments render, reaction sync, whether Slack users can create issues, and, on a Service Management desk, JSM privacy (keep internal notes internal, sync only customer-visible comments). Set it once per project — and, as in Step 4, click Save settings at the bottom of the page after any change.
That's it. Every ticket in a mapped, enabled project now gets its own Slack thread, and comments flow both ways — edits, attachments, and @mentions included.
Related
For the full reference — every command, template variable, and troubleshooting tip — see the documentation. Or read a playbook: engineering triage, support escalation, or incident response.
That's the whole setup — five steps, under ten minutes.